前言
在 Angular 中引入 NgRx(Angular-Redux) 全局状态管理库
正文
在之前我们写过 Redux 源码解析
在 Redux 中,核心就是三个概念, Action, Store, Reducer
通过 dispatch (分发) Action 给 Reducer ,Reducer 根据 Action 来生成新的状态,更新到 Store 中
Redux 是框架无关的,在 React 中有相关的 React-Redux 库,而 Angular 也有相关的 NgRx 库
虽然在 Angular 中,其实不是特别依赖状态管理,本身的 DI 功能其实就能实现状态管理
虽然能够通过 DI 来实现,但是对异步的处理可能不尽人意,并且没有一个规范来约束代码格式,多人开发下可能存在多种写法的问题
个人觉得使用类库(不只局限于 NgRx)的好处不仅仅是享受类库带来的 API ,另一个方面类库给了写法,保证了多人开发下代码的可维护性
以下代码会以登陆流程来作为例子
创建 Action
在使用 NgRx 前,我们需要引入它,可以直接使用 ng add @ngrx/store@latest
通过包名可知,NgRx 其实还有其他的模块,但是现在我们只需引入 store 模块即可,它就可以完成 Redux 的最基本的功能
Action 代表一组动作,表明想要干什么。它可以表示为一个简单的对象,如下
1
2
3
4
5
6
| const action = {
type: 'Action name',
payload: {
},
}
|
其中 payload 字段并不是必要的,也不是必须为对象,只是设为对象可以传递更多的数据而已,完全可以设置为一个字符串,或者数字,或者布尔值等基本类型
在 NgRx 中,提供了 createAction 这个 API 来给我们创建 Action 的工厂对象
1
2
3
4
|
import { createAction } from '@ngrx/store'
export const createLoginAction = createAction('[Action] login')
|
这样子,我们就创建了一个 loginAction 的工厂函数 createLoginAction
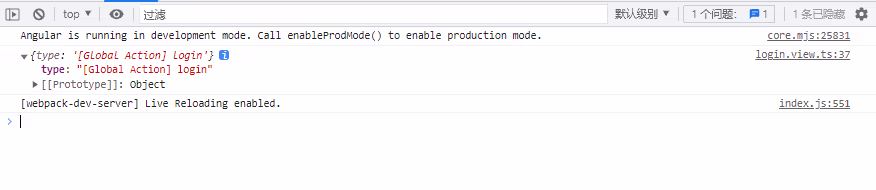
只要执行 createLoginAction() 我们就能得到一个 Action 对象了
![]()
可以看到他只是一个普通的字面对象
使用 createAction 的好处是该 API 提供了完整的类型约束
这里我们只是创建了一个只含有 type 字段的 Action ,但实际上对于登录来说,我们需要传递用户的用户名,密码等等
createAction 的第二个参数允许我们执行一个工具函数来表明 payload 载荷类型
1
2
3
4
5
6
7
8
9
| import { createAction, props } from '@ngrx/store'
export const createLoginAction = createAction(
'[Action] login',
props<{
username: string
password: string
}>(),
)
|
我对类型体操其实了解不多,确实是非常神奇,不懂不过问题不大,不影响我们理解代码
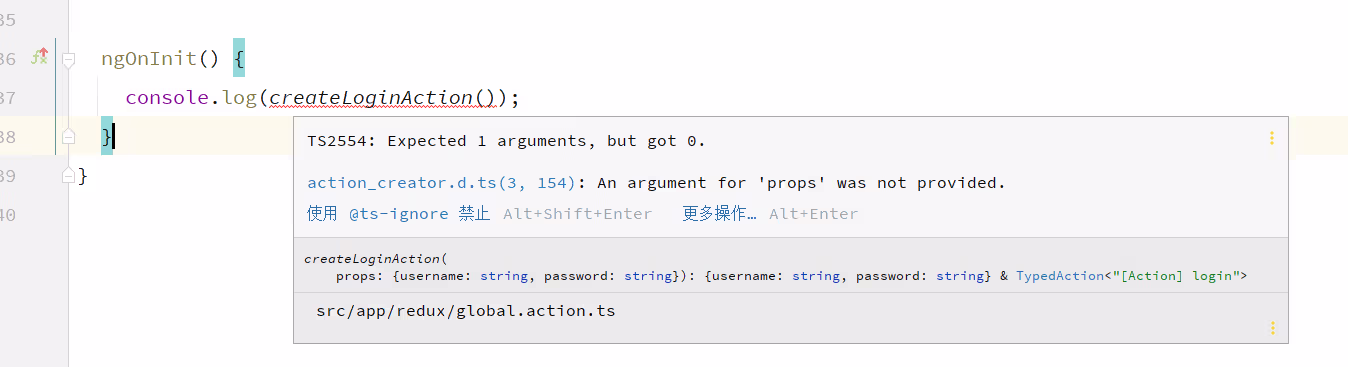
在限定 payload 载荷类型之后,我们通过 createLoginAction 创建 loginAction 时就要通过参数来传递载荷了
![]()
如果不传递是通过不了类型检查的,严格的类型检查能够提高代码的健壮性
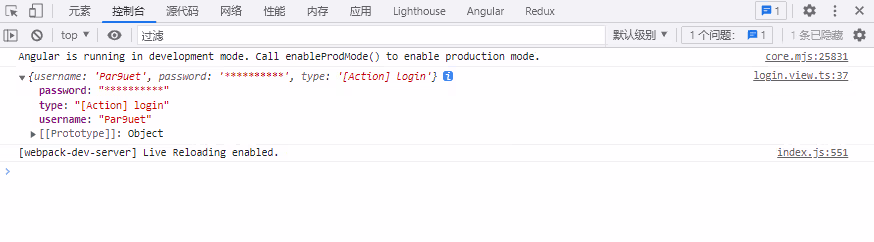
我们传入载荷对象之后打印该 Action
![]()
可以发现返回的对象并没有通过 payload 字段来存放载荷,而是直接扁平到 type 属性的对象中
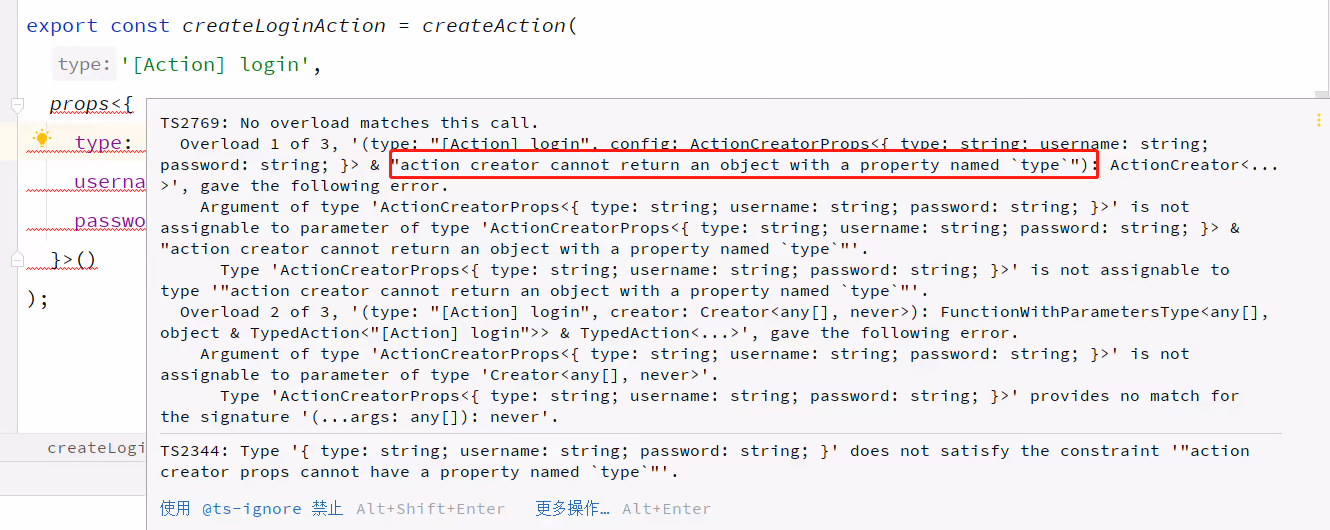
反过来意味着,我们无法在 props 上增加 type 属性,会报错
![]()
如果我们真的必须使用到 type 属性来表示某些信息的话,那我们只能以嵌套的形式来创建结构了,比如使用 payload 字段来存放载荷
1
2
3
4
5
6
7
8
9
10
11
12
| import { createAction, props } from '@ngrx/store'
export const createLoginAction = createAction(
'[Action] login',
props<{
payload: {
type: 'student' | 'teacher'
username: string
password: string
}
}>(),
)
|
当然我觉得没有必要,保持对象的简洁,不要出现过深的嵌套才是一个好的编码行为
创建 Reducer
有了 Action, 我们就需要一个 Reducer 来处理这些 Action,然后返回新的状态
在 Redux 体系中, Reducer 的作用其实非常的简单,传入 State 和 Action ,然后返回新的 State ,仅此而已
在 NgRx 中, 和 createAction 一样也存在 createReducer 这个 API 来帮助我们创建 Reducer
1
2
3
4
5
6
7
8
9
10
11
12
13
14
15
16
|
import { createReducer, on } from '@ngrx/store'
export const userReducer = createReducer(
{
username: '',
password: '',
},
on(createLoginAction, (state, { username, password }) => {
return {
...state,
username,
password,
}
}),
)
|
其中第一个参数是默认初始的 State ,接下来的参数都是以调用 on 函数来表明在何种 Action 下进行特定的状态更新
on 函数的第一个参数为 createAction 生成的工厂函数,第二个参数为一个回调,回调的第一个参数为当前的状态,第二个参数为载荷
需要返回新的状态,而这个新的状态会更新到 Store 中
这种写法更利于代码的分割,在原生的 Redux 下,我们一般使用 switch-case 语句来完成 Action type 的判断和相应的逻辑,代码会揉在一个函数的内部,逻辑复杂会使得整个函数变得复杂,不利于维护
创建 Store
在创建完 Action 和 Reducer 之后,我们需要向 Angular 中注入 Store
我们需要在根模块中使用 StoreModule.forRoot 来注入
1
2
3
4
5
6
7
8
9
10
11
12
13
| import { StoreModule } from '@ngrx/store'
import { userReducer } from './user.reducer'
@NgModule({
imports: [
StoreModule.forRoot({
user: userReducer,
}),
],
})
export class AppModule {}
|
注入 Store
在完成以上三个步骤之后,我们就可以开始写界面了
由于我们是以登录流程为例子,我们就写个简单的登录界面
1
2
3
4
5
6
7
8
9
10
11
12
13
14
15
16
17
18
19
20
21
22
23
24
25
26
27
28
| import { Component } from '@angular/core'
import { FormBuilder } from '@angular/forms'
@Component({
selector: `[app-index-login]`,
template: `
<form class="login-form" [formGroup]="loginFrom" (ngSubmit)="submit()">
<input type="text" formControlName="username" />
<br />
<input type="password" formControlName="password" />
<br />
<button type="submit">login</button>
</form>
`,
styleUrls: ['./login.view.less'],
})
export class LoginView {
loginFrom = this.fb.group({
username: this.fb.control('Par9uet'),
password: this.fb.control('Par9uet'),
})
constructor(private fb: FormBuilder) {}
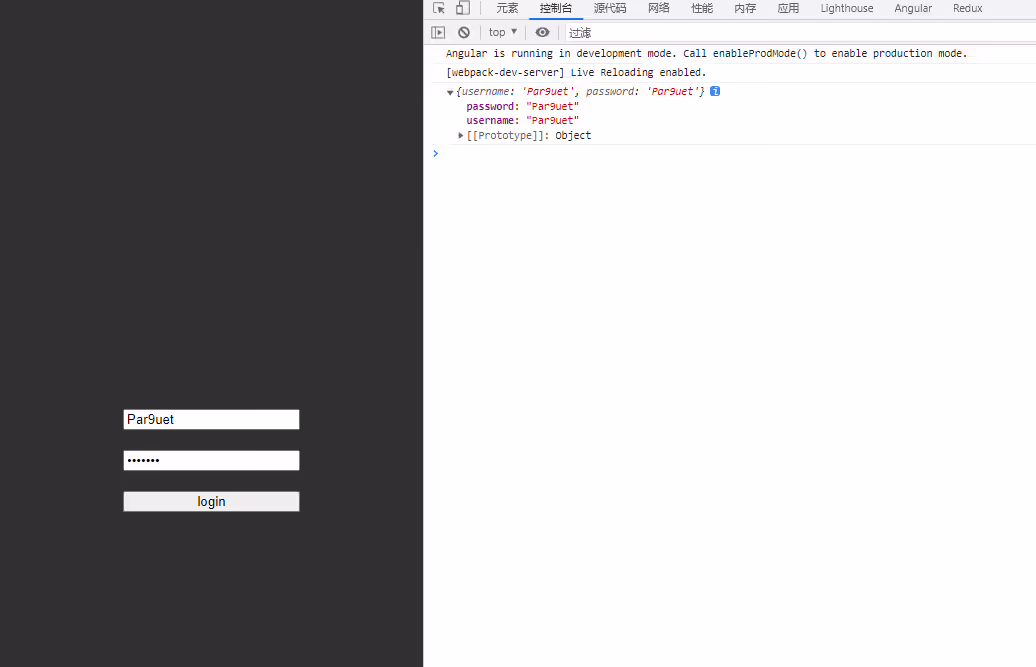
submit() {
console.log(this.loginFrom.getRawValue())
}
}
|
然后我们点击 login 按钮测试下
![]()
发现没有问题
接下来我们需要注入 Store
1
2
3
4
5
6
7
8
9
10
11
12
13
14
15
16
17
18
19
20
21
22
23
24
25
26
27
28
29
30
31
32
33
34
35
36
37
38
39
40
41
42
43
| import { Component, OnDestroy, OnInit } from '@angular/core'
import { FormBuilder } from '@angular/forms'
import { createLoginAction } from './user.action'
import { Store } from '@ngrx/store'
@Component({
})
export class LoginView implements OnInit, OnDestroy {
loginFrom = this.fb.group({
username: this.fb.control('Par9uet'),
password: this.fb.control('Par9uet'),
})
constructor(
private fb: FormBuilder,
private store: Store,
) {}
submit() {
const { username, password } = this.loginForm.getRawValue()
if (username && password) {
this.store.dispatch(
createLoginAction({
username,
password,
}),
)
}
}
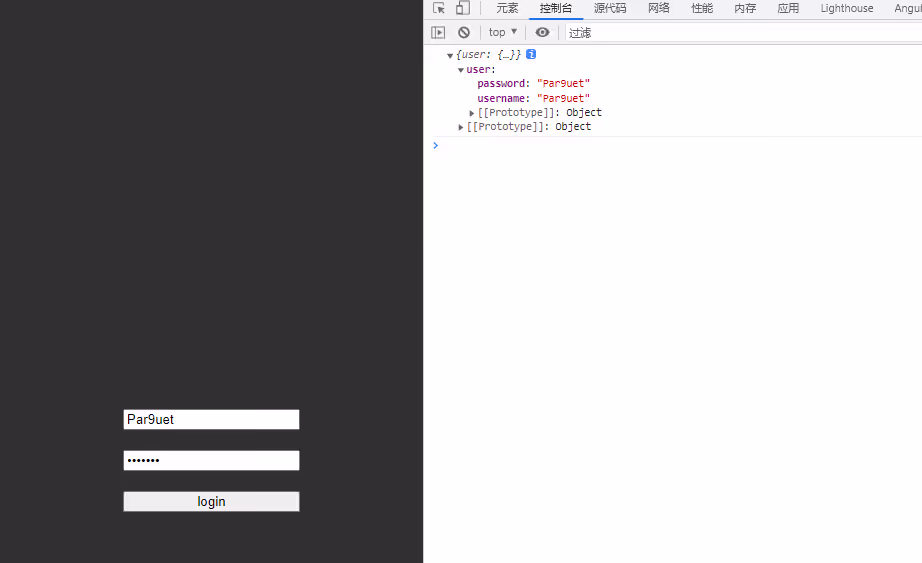
ngOnInit() {
this.store.pipe(takeUntil(this.destroy$)).subscribe((val) => console.log(val))
}
ngOnDestroy() {
this.destroy$.next()
this.destroy$.complete()
}
}
|
点击之后我们就可以看到 Store 内的值确实发生了变化
![]()
使用 Redux 扩展
当然,如果每次我们想看 Store 的内部情况就去写这些样板代码的话,太麻烦了
我们需要更加方便的形式
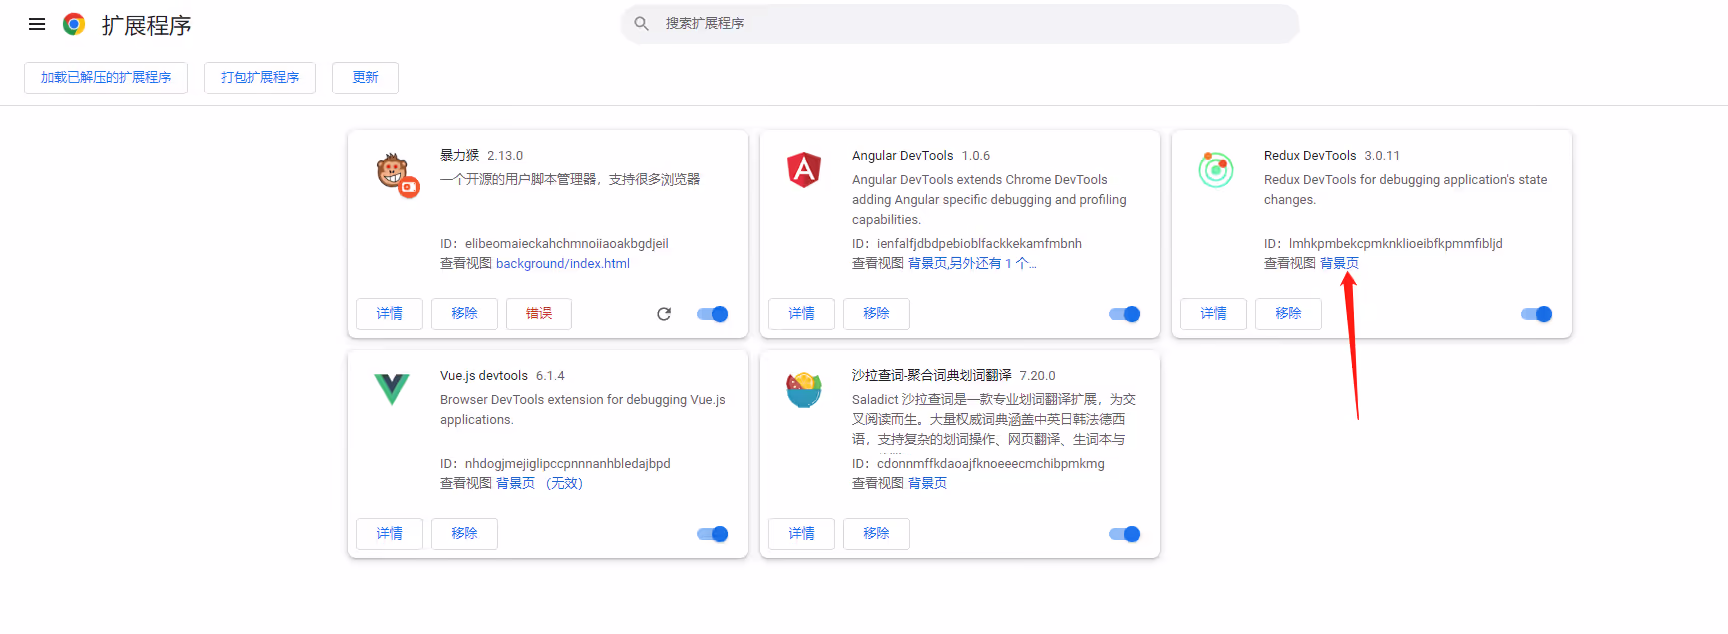
NgRx 提供了一个 @ngrx/store-devtools 的模块,这个模块可以和 redux 的官方扩展配合,在 f12 下查看详细的信息
首先我们要安装 Redux 扩展,这个直接在 Chrome 网上商店上搜索即可找到,确保 Redux 安装到 Chrome 中
![]()
接着引入 @ngrx/store-devtools ,控制台执行 ng add @ngrx/store-devtools@latest
然后在根模块上使用 StoreDevtoolsModule.instrument 注册这个模块
1
2
3
4
5
6
7
8
9
10
11
12
13
14
|
import { StoreModule } from '@ngrx/store'
import { StoreDevtoolsModule } from '@ngrx/store-devtools'
@NgModule({
imports: [
StoreModule.forRoot({
user: userReducer,
}),
StoreDevtoolsModule.instrument(),
],
})
export class AppModule {}
|
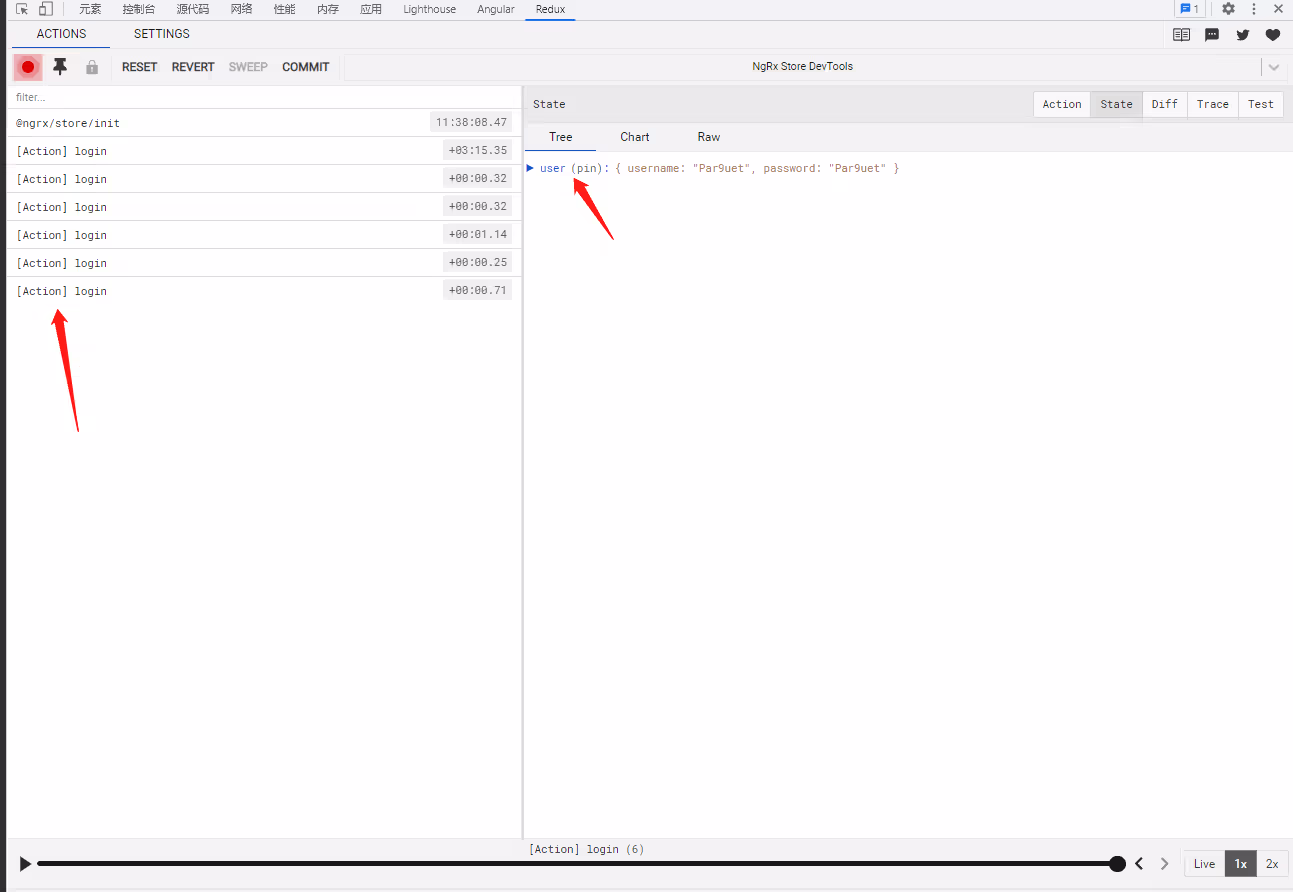
完成上面的操作之后,我们打开 Redux 扩展的面板,就可以看到内部的情况了,包括 Action 的分发时间线,Store 的状态变化等等
![]()
创建 Effect 副作用
到此 Redux 最基本的功能我们已经完成了
可能有人会说,你不是说这是登录功能吗,你把用户名,密码放 Store 里面有什么用,这不是脱裤子放屁吗
确实,确实是脱裤子放屁
所以接下来我们要改进这个例子
对于 Store 里用户的信息,一般我们是不存用户名密码的,很多情况下,没有意义,我们一般存用户登录成功之后的信息,比如 id,用户名,邮箱,签名,手机号等等
于是,我们改造下 Store 的格式
1
2
3
4
5
6
7
8
9
10
11
12
13
14
15
16
17
18
19
20
21
22
23
24
25
26
27
28
29
30
31
32
33
34
35
36
37
38
39
40
41
42
43
44
|
export const createLoginSuccessAction = createAction(
'[Action] login success',
props<{
id: number
username: string
email: string
sign: string
}>(),
)
export const createLoginFailureAction = createAction(
'[Action] login failure',
props<{
errorMsg: string
}>(),
)
export const userReducer = createReducer(
{
id: -1,
username: '',
email: '',
sign: '',
},
on(createLoginSuccessAction, (state, { id, username, email, sign }) => {
return {
...state,
id,
username,
email,
sign,
}
}),
on(createLoginFailureAction, (state, payload) => {
return {
id: -1,
username: '',
email: '',
sign: '',
}
}),
)
|
现在,我们没有 createLoginAction 这个工厂了
我们使用 createLoginSuccessAction 来代表登录成功,使用 createLoginFailureAction 代表登录失败
然后我们模拟一个登录接口
1
2
3
4
5
6
7
8
9
10
11
12
13
14
15
16
17
18
19
20
21
22
23
24
25
26
27
28
29
30
31
32
|
import { Injectable } from '@angular/core'
import { interval, map, Observable, take, throwError } from 'rxjs'
@Injectable({
providedIn: 'root',
})
export class UserApi {
login(
username: string,
password: string,
): Observable<{
id: number
username: string
email: string
sign: string
}> {
if (username === 'Par9uet' && password === 'Par9uet') {
return interval(300).pipe(
take(1),
map(() => ({
id: 24,
username: 'Par9uet',
email: '[email protected]',
sign: '籠の中に鳥',
})),
)
}
return throwError(() => new Error('账号密码错误'))
}
}
|
改造组件的 submit 方法
1
2
3
4
5
6
7
8
9
10
11
12
13
14
15
16
17
18
19
20
21
22
23
24
25
26
27
28
| export class LoginView {
constructor(
private fb: FormBuilder,
private store: Store,
private userApi: UserApi,
) {}
submit() {
const { username, password } = this.loginForm.getRawValue()
if (username && password) {
this.userApi.login(username, password).subscribe({
next: (userInfo) => {
this.store.dispatch(createLoginSuccessAction(userInfo))
},
error: (e: Error) => {
this.store.dispatch(
createLoginFailureAction({
errorMsg: e.message,
}),
)
},
})
}
}
}
|
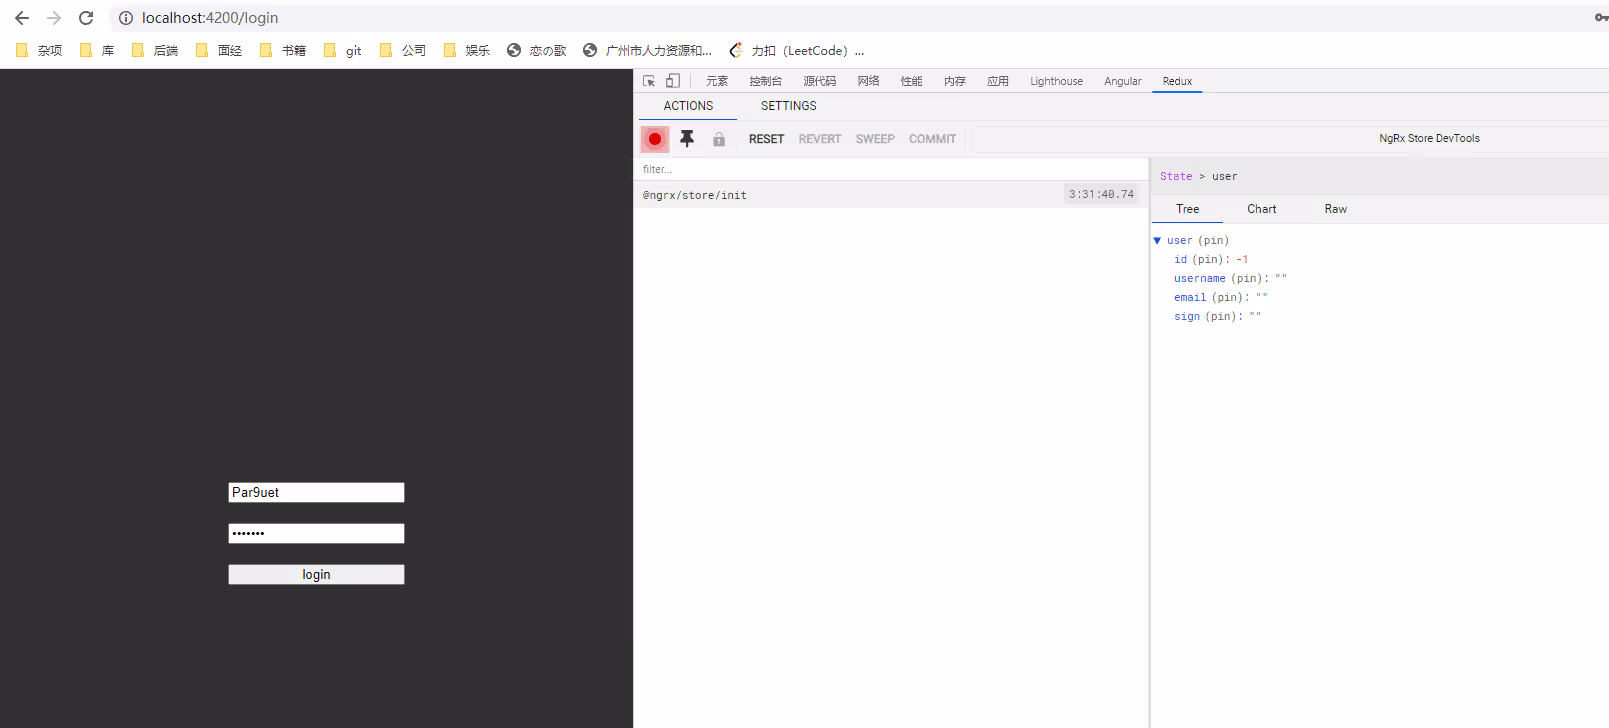
然后我们刷新页面,打开 Redux 扩展
![]()
可以看到 Store 被正确的初始化了
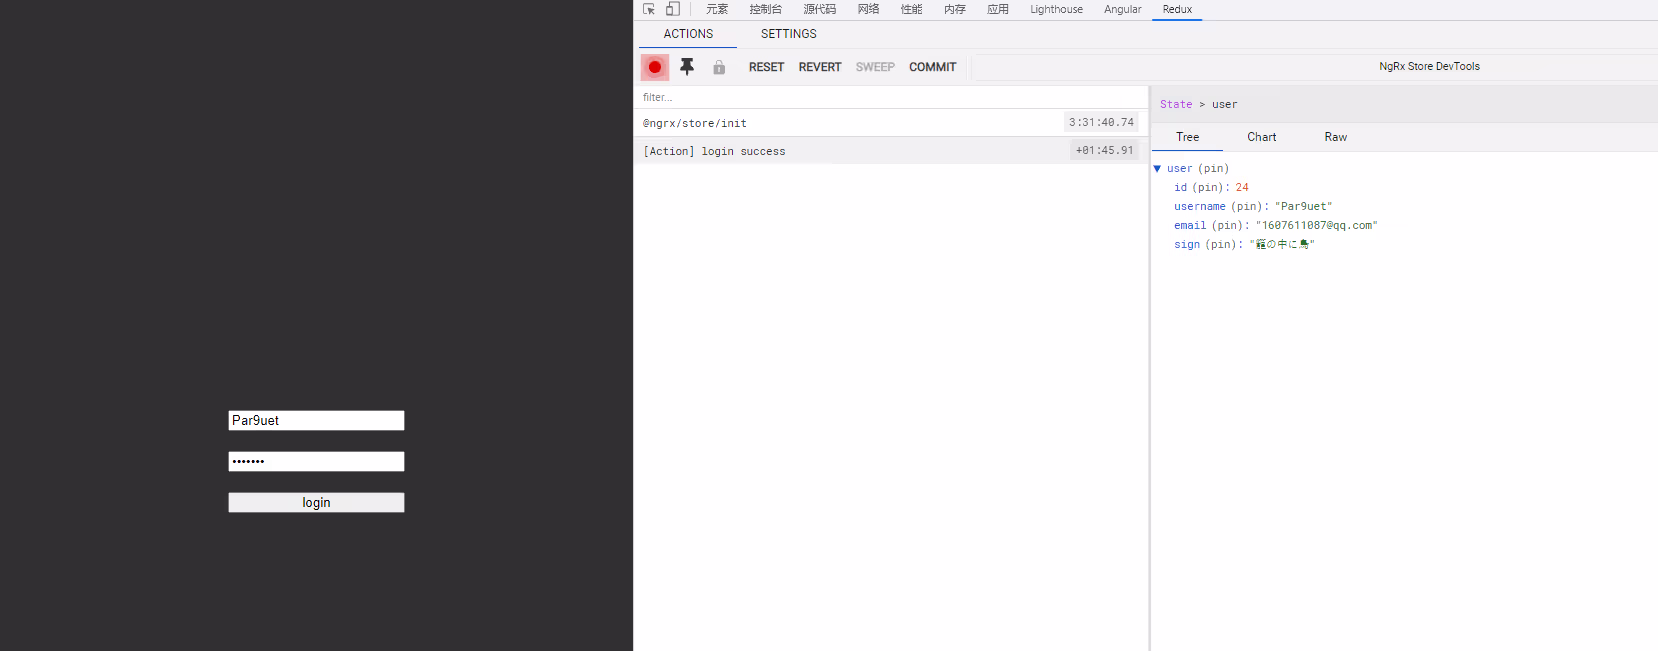
然后我们点击登录,这时在 300ms 之后登录成功之后更新了 Store
![]()
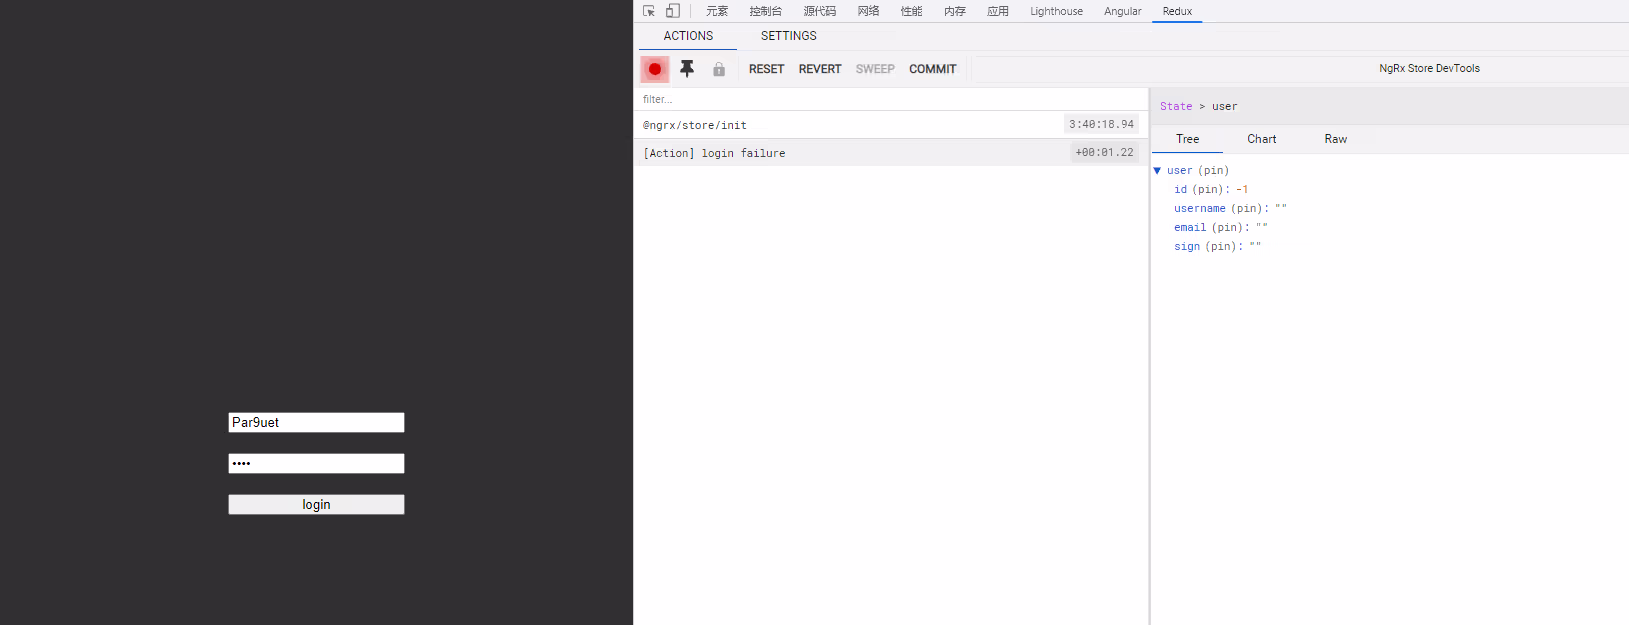
我们也可以模拟登录失败的情况(这里修改 password 为 abcd,这样 login 会返回一个 error 的 Observable)
![]()
看起来这个流程已经很不错了
我们在 http 请求之后去更新 Store 状态
但这有一个很严重的问题,就是 UI 耦合了业务逻辑,这里是 api 的调用
假如现在我们需要全局维护一个列表,在 page1 和 page2 上都可以对这个列表进行更新
那么按照上面的逻辑,我们需要在这两个页面中调用 api ,然后在 api 成功返回的时候更新列表,失败的时候把列表置空
理想状态下应该是 UI 提出:“我要更新列表,至于该怎么更新,我不管。”
没错,登录本身也是一个 Action ,如果我们可以发出一个 Action ,这个 Action 来调用 api 获取数据,然后更新 Store ,这样子我们就把 UI 和业务分割开了
但是我们知道,在 Reducer 中,分发 Action 来更新 Store 的行为是同步的,那么应该如果去生成一个异步的操作呢
在官方 Redux 库中,我们可以引入中间件来包装 dispatch ,使其拥有异步的能力
而在 NgRx 中,我们使用 Effect 来表明一个异步操作,更准确来说,使用 Effect 来表示一个副作用
要使用这项功能,我们需要引入 NgRx 的 Effect 模块,控制台执行 ng add @ngrx/effects@latest
现在我们需要 dispatch 一个 loginAction ,这个 loginAction 会去发出一个登录的请求,请求成功发出 loginSuccessAction,失败发出 loginFailureAction
我们需要为这个 Effect 编写一个服务
1
2
3
4
5
6
7
8
9
10
11
12
13
14
15
16
17
18
19
20
21
22
23
24
25
26
27
28
29
30
31
| import { Injectable } from '@angular/core'
import { UserApi } from './user.api'
import { Actions, createEffect, ofType } from '@ngrx/effects'
import {
createLoginAction,
createLoginFailureAction,
createLoginSuccessAction,
} from './user.action'
import { catchError, map, mergeMap, of } from 'rxjs'
@Injectable({
providedIn: 'root',
})
export class UserEffect {
login$ = createEffect(() =>
this.actions.pipe(
ofType(createLoginAction),
mergeMap(({ username, password }) =>
this.userApi.login(username, password).pipe(
map((user) => createLoginSuccessAction(user)),
catchError((error: Error) => of(createLoginFailureAction({ errorMsg: error.message }))),
),
),
),
)
constructor(
private userApi: UserApi,
private actions: Actions,
) {}
}
|
这里可以看到,我们使用 createEffect 创建了一个副作用,传入了一个函数
函数的内容其实非常容易理解,ofType 是 NgRx 提供的管道操作符,使用 ofType 筛选出 loginAction ,然后使用 mergeMap 来发起请求,使用 map,catchError 来返回接下来要触发的 Action
然后我们需要把这个 Effect 通过 EffectsModule 注入到跟模块中
1
2
3
4
5
6
7
8
9
10
11
12
13
14
15
16
17
18
19
|
import { StoreModule } from '@ngrx/store'
import { StoreDevtoolsModule } from '@ngrx/store-devtools'
import { EffectsModule } from '@ngrx/effects'
import { userReducer } from './user.reducer'
@NgModule({
imports: [
StoreModule.forRoot({
user: userReducer,
}),
StoreDevtoolsModule.instrument(),
EffectsModule.forRoot([UserEffect]),
],
})
export class AppModule {}
|
然后我们回到 UI 组件上,现在我们的 submit 方法就非常简单了,发出 loginAction 即可
1
2
3
4
5
6
7
8
9
10
11
12
13
14
15
16
17
18
19
20
21
22
|
export class LoginView {
constructor(
private fb: FormBuilder,
private store: Store,
) {}
submit() {
const { username, password } = this.loginForm.getRawValue()
if (username && password) {
this.store.dispatch(
createLoginAction({
username,
password,
}),
)
}
}
}
|
然后我们点击登录,就可以看到 Action 的变化了
![]()